Showing posts with label Adobe. Show all posts

Sunday, December 9, 2012

Photography Gift Guide

Christmas is upon us but there is still time. Do you have a photographer on your list? Ever wanted to know what to get them? Here is a quick list of cool photography related items you can pick up for your favorite photographer. The very first item on the list is the most inexpensive. It is an e-book that I wrote detailing the basics of photography. Even if you are an old salt at this the book can help reinforce the foundations of photography.


Learning Photography
Understanding the Basics of Exposure by Jason Eldridge (that’s me!) e-book only $2.99
http://www.eldridgestudios.blogspot.com/2012/10/exciting-news.html

Exposed Workshop by Gavin Seim
http://exposedworkshop.com/

Post Processing
Lightroom 4
http://www.amazon.com/Adobe-65164937-Photoshop-Lightroom-4/dp/B007BG9VLK/ref=sr_1_1?ie=UTF8&qid=1355078363&sr=8-1&keywords=lightroom+4


Nik Software
http://www.niksoftware.com/store/usa/entry.php?view=singlepurchase/usa_CC_ps_aa-family.shtml


Clothing
T-Shirts
http://www.cafepress.com/mf/16881588/oh-crop-dark_tshirt
http://www.cafepress.com/mf/59423833/camera-dialwhite2_tshirt


Accessories
Strap
http://www.blackrapid.com/products

Rogue Flash Bender
http://www.bhphotovideo.com/c/product/707213-REG/ExpoImaging_ROGUERELG_Rogue_FlashBender_Large_Positionable.html

Umbrella (Zumbrella)
http://store.ziser.com/zumbrella.aspx

Attachable Lens Cloth
http://www.bhphotovideo.com/c/product/507196-REG/Pearstone_LENLP1.html

Think Tank Retrospective 20(Bag)
http://www.thinktankphoto.com/search.aspx?find=Retrospective%c2%ae+20+(Pinestone)

Camera Cleaning
http://www.copperhillimages.com/shopping/pgm-more_information.php?id=9&=SID#MOREINFO

Wednesday, November 21, 2012

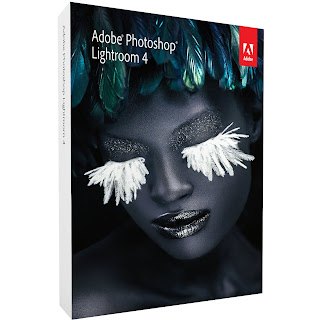
Adobe Lightroom 4 Deal

Adobe Lightroom 4 is arguably one of the best programs for editing, sorting, and managing you photographic workflow.  It changed how I process images and I do 95% of all my editing within this one program.  Right now there is a special offer and you can get the full version for 109.99.  If this is something you have considered purchasing don't waste any time!  Perhaps you know a photographer that has been wanting to make the purchase but hasn't.  It would make a great Christmas gift.  Now is the time!

If you do make the purchase search my blog for Lightroom Tutorials.  I have several videos you can watch for free. 


Saturday, September 1, 2012

How to Import Images in Lightroom 4

Click photo above to view the video.
You can read all this stuff or you can watch the included video.

With the cost of Lightroom 4 being dropped to 149.00 there have been a lot of people giving it a go. One of the most often misunderstood aspects of Lightroom with new users is how Lightroom manages your photos. Well, here is the truth. It doesn’t… However, Lightroom does have tools that allow you to better manage your photo files. Lightroom doesn’t care where your photos are located so you can copy them from your memory card to your hard drive in a specific location before importing into Lightroom or you can leave them on the card and ask Lightroom to do it for you.


If you are in the Library Module on the bottom left side of the screen you will see the “Import” button. Push that. The Lightroom dialogue box will appear.

There are really only three aspects to this box.

1. Where From: The left hand side deals with where the files are currently located.

2. How you want Lightroom to handle the photos: This portion is in the middle of the dialogue box at the top of the screen. This is where many folks get a bit confused about what it is Lightroom is really doing. You have three options to choose from. Copy, Move, and Add. Let’s take a closer look.


Copy

• This is the option that I use 99% of the time. This is where you point Lightroom to a specific folder and/or memory card and tell it to copy the files in that location and paste them into a new location. The new location you choose with aspect three listed in the next section. I use this one over the Move choice simply because I like to ensure I have all the images in my backup locations prior to deleting them off the card.


Move

• The Move option does exactly what it says it does. It moves the files from their current location to the location that you have specified. (see the third aspect)


Add

• Add is the one that gives people the most trouble. This is because when you ADD photos all you are doing is bringing in the photos to the Lightroom Catalog. The images remain exactly where they were. This means if you moved your images to a folder on your desktop and you “ADD” them to the Lightroom catalog the files do not get moved or copied. This also means that if you move or delete the desktop folder and you do not tell Lightroom then it doesn’t understand where they all went. If you remove the original location and you open up lightroom you will see the thumbnails that it created when you imported the image. However, you will see writing across the image that says it cannot find the source file. Now, provided you have not deleted the originals there are ways to tell Lightroom where to look.

3. Where to put them: If you have chosen Copy or Move then you have the option of telling Lightroom where you want the files to be copied or moved to.


Thursday, August 30, 2012

How to Load Presets in Lightroom 4

This is video that details the steps needed to add presets into Lightroom 4.  If you have every purchased or downloaded presets for Lightroom but could not get them to load, watch this video!


Click the photo above to start the video.


Thursday, March 8, 2012

Lightroom 4 Introduction Video

Below is a video introduction to Lightroom 4.  This introduction is based on my first impressions and only pertains to still images.  LR4 has the capability of working with video but I do no have any experience with that portion yet.  All and all this is a solid program worth looking at for an upgrade or initial purchase.  Adobe will allow you to upgrade to LR4 for 79.00 regardless of what previous version you have.  Way to go Adobe.  On top of that if you do not have a previous version but you are considering it the prices is 149.00!!!!  That is half the price of LR3 upon release.  It looks like the lowering of Aperture 3 in Mac App Store had an effect.  As always should you have any questions feel free to drop me an e-mail or even call.  Thanks again and stay tuned!!!!


Sunday, December 4, 2011

Video Tutorial-Removing Dark Circles Under the Eyes

Have you ever noticed that sometimes just under the eyes you see dark shadows.  This is caused by a light source casting a shadow.  It is certainly more defined on some than others but often times it cannot be avoided at the time of capture.  Photoshop gives us ways of correcting these shadow.  Take a look at the video below to see at least one method.
This will take you directly to my website where you can check out other video tutorials.  You can also change the resolution there to best fit your download speeds.  Enjoy!!!

Wednesday, September 28, 2011

Lightroom-Photoshop Transition

This video is a quick tutorial on how to transition an image from Lightroom to Photoshop and back again.

Sunday, September 18, 2011

Workflow

This is a quick Lightroom 3 tutorial on may basic workflow.  Specifically, how I import my files.  Understand that this is MY workflow so take any nuggets you get from this and leave the rest.  Your workflow has to work best for you.  I hope this gets you started.  Thanks again for watching.

Thursday, September 15, 2011

Lightroom 3 Brush Tutorial

Here is a quick Lightroom 3 Tutorial on how to use the brush tool.  This will get you in the right direction as far as using the brush.  I certainly would encourage you to play around with this feature until you are very familiar with the tool.  If you have any questions ask away!!


Thursday, September 1, 2011

Lightroom 3 Keyboard Shortcuts

Lightroom 3 Keyboard Shortcuts

I have been using Lightroom for a good bit of time now and I have learned some very useful shortcuts.  These may not seem like they save that much time but when you spend hours editing it can really add up.  There are hundreds shortcuts in Light room but I want to show you the ones that I find most useful.  Since I am now a Mac guy that used to be a PC guy I will also list the shortcuts for both Mac and Windows.  Reminder:  This is not a complete list.  You can find all of the short cuts straight from the Adobe website here.

Action
Mac OS
Windows
Show/hide side panels
Tab
Tab
Hide all Panels
Shift + Tab
Shift + Tab
Enter Library/Develop Grid view
G
G
Open selected photo in the develop module
D
D
Cycle forward/backward through Lights Out modes
L / Shift + L
L / Shift + L
Cycle Screen Modes
F
F
Zoom
Z
Z
Increase/decrease Grid thumbnail size
=/-
=/-
Scroll up/down Grid thumbnails
Page Up/Page Down
Page Up/Page Down
Cycle Grid Views
J
J
Group into stack
Command + G
Ctrl + G
Unstack
Command + Shift + G
Ctrl + Shift + G
Flag Photo as Pick
P
P
Flag Photo as a reject
X
X
Unflag Photo
U
U
Star Rating
1 – 5
1 – 5
Show/hide Library Filter bar
\
\
Edit in Photoshop
Command + E
Ctrl + E
Develop Shortcuts
Sync settings
Command + Shift + S
Ctrl + Shift + S
Select Spot Removal Tool
Q
Q
Select Crop Tool
R
R
Constrain Aspect Ratio
A
A
Select Adjustment Brush
K
K
Increase/Decrease Brush Size
[ / ]
[ / ]
View before and after
\
\


Wednesday, August 31, 2011

Guest Blog for Angeline-Marie - Developing a Style

Recently I was asked to write a guest post for Art Studio Reports by Angeline Marie.  Take a look!  If you are interested in art make sure you check out some of her other blog posts and website.  Just follow this LINK.

Thursday, August 18, 2011

Photoshop Elements: A Poor Man’s (or Woman’s) Photoshop

With the switch to Mac I lost my Photoshop CS5 Extended… which is just sad. I do not have the $999.00 to spend on the Photoshop CS5 Extended so I reluctantly went with Photoshop Elements 9. Elements 9 only costs $99.00 (which I got free with my Wacom Tablet). The first thing I noticed is that it works very similar to Photoshop CS5. Then, I noticed that everything I do in CS5 to develop my images is available in Photoshop Elements 9 with only minor exceptions.

It’s tools include:*
Photomerge (for panoramic photos)
Layers
Blend Modes
Most Filters
Supports the Wacom Tablet sensitivity

What it does not include:*
Smart Objects
Not all filters

Since I still use Photoshop Lightroom 3 for 95% of my editing this was not a big deal. All and all I still want CS5 because of the power and all the available options but until I can come up with the 999.00 for CS5 Extended Photoshop Elements 9 will certainly do the trick.

Now, if you happen to go to college, have a kid in school, home school, or you work for an education institution you can get CS5 for $168.00 using the education discount. Wow is all I can say!

*This is not a complete list but rather a list of items that I specifically use for photo editing.

Monday, August 8, 2011

How to Make Lightroom Presets

Check out this short video and find out how you can quickly create Lightroom presets.  By having presets available you can significantly decrease the amount of time you spend in post processing.  While it might now be set exactly right for each photograph it will get you very close.  If you are seeing this post of Facebook you can follow the YouTube link here.

Tuesday, August 2, 2011

Well, Crop it!

Should you crop your photos? It depends. If you are a photojournalist then you should not crop your photos. Photojournalists generally do not make any adjustments to their photos because their clients (newspapers, local news tv etc) require that the photos be untouched for authentic reporting purposes.

If you are not a photojournalist then CROP the photo if it is needed. I attempt to get everything correct in camera because when you crop you lose image quality. This cannot always be accomplished so when cropping is necessary I crop. When you are not taking a photojournalist approach the end result is the most important part of the process. If you photographed a crooked image then straighten it with the crop tool. If you see some weird person stupidly standing in the frame and you can crop them out then crop them out. While you are processing and you can use the crop tool to tighten down the image to really bring out the rule of thirds then crop…

The small example I have here is of a cat.  I took the photo and it stands as is with two exceptions. The location of the cats head within the frame and the distracting white wall and assorted stuff on the right side of the photo...  However, when I crop it down and remove any distracting objects or areas of the frame it has a stronger feel.  The head of the cat is now in the third nodal point of the rule of thirds.  Remember, the rule of thirds can be power but think of it more as a guideline than a hard fast rule.
First and foremost get it as right as you possible can in camera but always remember… You are an artist so use the tools that are available to make the best possible image for you and for your clients.