Showing posts with label photography. Show all posts
Showing posts with label photography. Show all posts
Sunday, December 30, 2012
Best of 2012
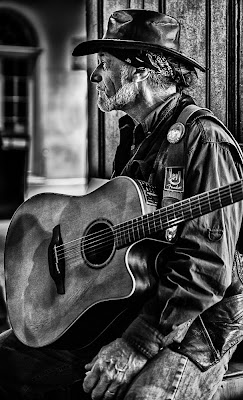
Each year I look back on my images and pick a few of my favorite ones. This year I have 42 photos to show so lets get right to the images.


Labels:
2012,
best of 2012,
gavin seim,
gold coast railroad museum,
great smokey mountains,
images,
key biscayne,
lakeland,
miami,
new orleans,
photography,
sun n fun,
Tennessee,
train,
wedding photography
Wednesday, December 12, 2012
Great Christmas Gift for a Photographer
 |
| iPad Version |
Hey folks, quick reminder, I recently released my book "Understanding the Basics of Exposure". This is a great gift for someone you know just getting into photography or wants to improve their photos. Consider my book as a virtual stocking stuffer for Christmas, too! It makes a great companion to any photographer's gift! The guidance works for most any camera, because Understanding the Basics of Exposure reinforces the skills of the photographer.
 |
| PDF Version |
iPad Version:
PDF Version:
Make sure to check back on the blog regularly! It is filled with valuable information that you can put to use and it’s free!!
www.eldridgestudios.blogspot.com
Just click the black void below to start the promotion video!
Tuesday, November 27, 2012
Be Deliberate
With the advent of the digital photographic age it seems that we as photographers are trying to speed everything up. While aspects of photography like post processing, workflow, and frames per second certainly have benefits for speed there is one aspect that doesn’t. I am talking about the time it takes to create or make an image. When photographing with slide film we generally took a bit more time because each frame cost money. Not only did it cost to buy the film in the first place but it cost more in most cases to have it developed, especially if you used a professional lab. To really improve we also had to take notes for given situations and try to match them up when we received our images back after a couple weeks. It was a painful process. However, in that process we became masters of our work. We took extra time to see the tonality of the image and to ensure that everything was perfect before we clicked the button. “Fix it in Photoshop” wasn’t an option. If we didn’t get it right we wasted money and the shot was lost.
I have been guilty of moving too fast and rushing through a session or an outing. It is very easy to get in the habit of taking several shots to get it all set rather than setting it all and taking a shot. It seems that we as photographers are often under pressure, actual or perceived, to give a client hundreds of images (or even thousands for weddings) rather than a handful of great images. By doing that I am not certain that we are providing the quality service that we could. Besides, if you take the time to get it right then you can move on to other scenes or compositions. Being deliberate with your photography also helps speed up your workflow and post processing because there is less editing involved.
Sure, at a wedding you may have to move a little faster and take a few more images but that was the case back in the film days too. A wedding day is full of things needing photographed and you are on a time table! Perhaps you are a child photographer and you have to take several shots to get the expression you want. That too is fine and if you have taken the time to get everything set then when that expression shows itself you can easily get the shot. Don’t spray and then pray you got the shot. Know that you got it and move on.
This blog post is as much for me as it is for you and here is my final advice. Slow down and be deliberate. I’ll bet your images improve right away if you take the time to make them.
Wednesday, November 21, 2012
Understanding Exposure!
Adobe Lightroom 4 Deal
 Adobe Lightroom 4 is arguably one of the best programs for editing, sorting, and managing you photographic workflow. It changed how I process images and I do 95% of all my editing within this one program. Right now there is a special offer and you can get the full version for 109.99. If this is something you have considered purchasing don't waste any time! Perhaps you know a photographer that has been wanting to make the purchase but hasn't. It would make a great Christmas gift. Now is the time!
If you do make the purchase search my blog for Lightroom Tutorials. I have several videos you can watch for free.
Monday, November 5, 2012
Understanding Aperture
Below you will find an excerpt from my book “Understanding the Basics of Exposure”. This will help you get a better idea of the books content as well as teach you a little about the Aperture and how it is used. If you know of anyone into photography please share this post. I believe that the book can help those just getting started as well as reinforce the basics for those who have been doing this for awhile. You can find out more about the book here:
http://eldridgestudios.blogspot.com/2012/10/exciting-news.html
and here:
http://eldridgestudios.blogspot.com/2012/11/quick-reminder.html.
Enjoy this excerpt and please leave a comment and let me know what you think.
_________________________________________
What is the Aperture?
How the Aperture is Used?
The aperture is used when determining proper exposure. If you think of the aperture as a faucet and light as water it might be easier to understand. If you turn a faucet on full blast it is letting a large amount of water flow. That would be the equivalent of a wide open aperture i.e. f2.8. If you turn the water on just slightly where there is only a trickle then you have a small aperture i.e. f22.
Not only is aperture used to help determine proper exposure but it is used to determine depth of field.
• Depth of Field (DOF)
http://eldridgestudios.blogspot.com/2012/10/exciting-news.html
and here:
http://eldridgestudios.blogspot.com/2012/11/quick-reminder.html.
Enjoy this excerpt and please leave a comment and let me know what you think.
_________________________________________
What is the Aperture?
Aperture in its basic definition is a hole in which light travels through. This opening is increased or decreased using a series of blades within the lens of a DSLR. The number that is used to indicate the size of the opening is called an f-stop. The f-stop number is determined by dividing the focal length of the lens by the diameter of the pupil (or opening). Luckily in the camera world we just have to pay attention to the numbers after the “f” to know the f-stop. Smart people somewhere already did the math.
- DOF is the distance between the nearest and farthest objects in a photograph that appear reasonably sharp. Think of this area as the focal plane as well. Lenses can precisely focus on a given point. However, anything closer or further away from that point begins to leave the focal plane. This is how you get the nice blurry backgrounds you see in some photographs or the tack sharpness in others.
- The smaller the opening (higher the f-stop number) the greater depth of field. Think of it like squinting your eyes.
- The larger the opening (smaller the f-stop number) the shallower the depth of field.
•Aperture is one of the most powerful tools in a photographer’s arsenal to creating compelling images. It vital to your photography that you fully understand what changing aperture numbers will do to your photograph.
Below is a list of typical f-stops you typically see on modern lenses and a graphical representation of what happens to the depth of field as the f-stop number changes. I highly recommend that you memorize these apertures as it will help you later when you are determining manual exposures and depth of field.
Subscribe to:
Posts (Atom)


